By Wu Peng, Senior Process Instrumentation Engineer · Last reviewed August 10, 2026
Pressure transmitter troubleshooting starts at the loop current, not at the instrument. A healthy 4-20 mA transmitter sits between 4.00 and 20.00 mA; 0 mA means an open loop or no power, a reading below 3.6 mA or above 21 mA is the transmitter reporting its own failure, and a value parked at 3.8 or 20.5 mA is saturation, which usually points at the process or the range rather than the electronics.
Those numbers sort most faults before a single cover comes off. This guide gives the current bands, the checks that separate the control system from the transmitter, and the diagnosis for each symptom: no output, stuck output, wrong readings, and unstable readings, with the voltage and tolerance figures to judge each test.
Contents
- Read the loop current
- Rule out the system
- No output
- Stuck high or low
- Reads wrong
- Unstable readings
- Repair or replace
- FAQ
Read the loop current
The output current is a diagnostic channel in its own right. Most transmitters follow NAMUR NE43 or something close to it: the usable signal spans 3.8 to 20.5 mA, and currents outside that window are deliberate failure signals. The table below is the first thing to check against, because each band calls for a different response.
| Loop current | What it means | First move |
|---|---|---|
| 0 mA | Open loop, no supply, or reversed polarity | Check power and wiring; see No output |
| Below 3.6 mA | Transmitter self-diagnostic alarm, failed low | Read the device status over HART; plan replacement |
| 3.8 to 4.0 mA | Saturated low: process below the calibrated range | Check isolation valves, range, and applied pressure |
| 4.0 to 20.0 mA | Normal measuring range | If the value looks wrong, see Reads wrong |
| 20.0 to 20.5 mA | Saturated high: process above the calibrated range | Confirm real overpressure before blaming the meter |
| Above 21 mA | Transmitter self-diagnostic alarm, failed high | Read the device status; plan replacement |
Alarm levels vary by make and configuration: 3.6 or 3.75 mA low, 21 to 23 mA high. The direction is a jumper or software setting; record which way each transmitter is set.
The distinction matters because a transmitter at 3.9 mA is still measuring; the process is simply below the range. A transmitter at 3.6 mA has stopped measuring and is telling the control room so. Treating both as the same fault wastes hours. Our 4-20 mA current loop guide covers how the live zero and fault bands are built into the signal.
Rule out the system
Reported transmitter failures regularly trace back to the control system: a wrong tag, a failed analog input channel, bad scaling, or a dead loop supply. Before blaming the instrument, compare the value shown at the DCS or PLC with the current measured at the transmitter. If a clamp meter or a series multimeter at the field end shows 12.0 mA while the control room shows something else, the transmitter is fine and the problem sits in the card, the scaling, or the wiring between them.
Two bench-style checks isolate each half of the loop. To test the input card, disconnect the transmitter and feed the card from a loop calibrator, or read the voltage across the input resistor. To judge any reading without breaking the loop, measure DC volts across the 250 ohm sense resistor and convert:
| Signal | Loop current | Volts across 250 ohm |
|---|---|---|
| 0 percent | 4 mA | 1.00 V |
| 25 percent | 8 mA | 2.00 V |
| 50 percent | 12 mA | 3.00 V |
| 75 percent | 16 mA | 4.00 V |
| 100 percent | 20 mA | 5.00 V |
Ohm’s law: V = I x R, so 8 mA x 250 ohm = 2.00 V. Note the 1 V offset from the live zero; percentage-of-5V shortcuts get the middle rows wrong.
One number causes regular confusion here. A 250 ohm resistor is the minimum loop resistance HART communication needs, the usual sense resistor value at analog inputs, and a handy test load on the bench. Same part, three jobs; which limit applies depends on which job it is doing.
No output
Zero milliamps means no current is flowing at all. The causes are wiring polarity, an open circuit, or a supply problem, and a DC voltmeter finds them without breaking the loop.
With the loop powered, the voltage across the transmitter terminals tells the story: a live two-wire transmitter must sit inside its rated window, commonly about 10.5 to 42 V depending on model and load. If the terminals show the full supply voltage but the current is 0 mA, the loop is continuous and the transmitter is not conducting; suspect reversed polarity or a failed output stage.
If the terminals show close to 0 V, the supply is dead, a fuse is open, or the break is elsewhere; move the meter along the loop, and the full supply voltage will appear across the open point.
Low supply voltage produces a subtler version of the same fault. The transmitter needs a minimum terminal voltage to operate, typically 10.5 to 12 V for common models, and every ohm in the loop takes its share. The budget is worth two minutes of arithmetic:
V at terminals = V supply − 0.020 A x (R sense + R cable + R barrier)
24 V supply with 250 + 25 + 300 = 575 ohm in the loop: 24 − 0.020 x 575 = 24 − 11.5 = 12.5 V at 20 mA
That loop works, but with no margin: a transmitter that needs 12 V gets 12.5 V at full scale. Push the current to a 21 mA fault level and the drop grows to 12.1 V, leaving 11.9 V, below the requirement.
The result is a loop that measures normally most of the day and misbehaves near the top of the range or during an alarm, a pattern that gets blamed on the transmitter when the real fault is the loop design. The fix is fewer ohms or more volts; our loop-powered devices guide works through the same budget with indicators in the loop, and the maximum load follows the familiar rule R max = (V supply − V min) / 0.020 A = (24 − 12) / 0.020 = 600 ohm.
Stuck high or low
An output frozen at the bottom or top of the range splits into two cases by the current value. At 3.8 to 4.0 mA or 20.0 to 20.5 mA, the transmitter is saturated: it is measuring correctly, and the pressure is simply outside the calibrated span. A closed isolation valve, an isolated impulse line, or a calibrated range whose limits do not bracket the actual pressure all park the output at an end without anything being broken.
Open the manifold in the right order, confirm the range against the loop sheet, and compare with a local gauge before condemning the instrument.
A blocked impulse line behaves differently from a closed valve in one useful way: the reading does not have to sit at an endpoint: it freezes wherever the trapped pressure happens to be, and the normal flicker of process noise goes quiet.
A live pressure signal always shows a little movement. A perfectly smooth trace on a line that should show pump ripple is a plugged or frozen line, not a stable process. Blowdown or heat tracing fixes it; our pressure transmitter installation guide covers impulse line slopes and freeze protection that prevent the repeat visit. If the plug is the medium itself, such as paint, mud or asphalt, a flush diaphragm pressure sensor removes the port that packs solid.
A reading pinned above 21 mA or below 3.6 mA is the self-diagnostic alarm from the table above. Overpressure spikes that damage the diaphragm, a failed sensor element, or corrupted electronics all end here.
One trap deserves a mention: a loop with barely enough supply voltage may try to drive a 21+ mA alarm current and fail to reach it, so the output climbs toward 21 mA and hangs. If a transmitter latches near the top on a lightly powered loop, run the voltage budget from the previous section before replacing anything.
Reads wrong
A transmitter that responds to pressure but reads wrong has a calibration-shaped problem, and the as-found pattern says which kind. An error that is the same size across the whole range is zero shift. An error that grows in proportion to the reading is span drift. Check both ends: vent the transmitter to atmosphere (gauge types only) and read the zero, then compare a known pressure near the top against a reference gauge.
Judge the zero against the accuracy class rather than against perfection:
| Accuracy class | Allowed error | Acceptable at 4 mA |
|---|---|---|
| 0.5% of span | ±0.08 mA | 3.92 to 4.08 mA |
| 0.25% of span | ±0.04 mA | 3.96 to 4.04 mA |
| 0.1% of span | ±0.016 mA | 3.984 to 4.016 mA |
Span is 16 mA, so 0.5% of span = 0.08 mA. A zero inside the band needs no action; log it and leave it.
Installation puts offsets on healthy transmitters too. A wet leg of condensate adds hydrostatic head: 1.5 m of water is 14.7 kPa, which on a 0-200 kPa span shifts the output by 1.18 mA, about 7.4 percent of span. That belongs in the range calculation, not in a trim.
On gauge transmitters, a blocked or waterlogged reference vent shows up as a zero that wanders with the weather; a ±3 kPa barometric swing moves the same 200 kPa span by ±0.24 mA. Clear the vent or the vented cable before touching the trim.
When the error is real and documented, the repair is a calibration decision, not guesswork: zero trim for a small verified zero shift, sensor trim when the error survives at multiple points, and re-ranging is not calibration at all. Our pressure transmitter calibration guide gives the five-point procedure and the trim decision rules, and calibration vs verification covers what to record.
Unstable readings
An output that jumps around has either a real unstable pressure, a bad connection, or interference. Pull gently on each conductor at the terminals; a loose strand under a screw produces exactly this signature, and so does moisture. A cable gland pointing upward drains rainwater straight into the terminal compartment, which is why the drip loop and a downward entry matter. Green corrosion on the terminals confirms it.
Electrical noise is next. Keep the signal pair in shielded twisted cable, ground the shield at one end only, and route it away from variable speed drives and motor cables. As a working figure, AC ripple on the loop should stay under about 0.2 V peak to peak; more than that and readings visibly jump. A multimeter on AC volts across the sense resistor makes the check trivial.
If two grounds have crept into the loop, current finds a second path and the reading shifts or wanders; break the loop and confirm there is exactly one ground point.
Genuine process pulsation from a piston pump is not a fault, but it does not belong in the signal either. To study the pulsation rather than suppress it, a high-frequency dynamic pressure sensor resolves rise times down to 2 µs. Damping in the transmitter, set in seconds, steadies the display without hiding real trends. If damping is already high and the trace still jumps, stop trusting the damping number and find the electrical cause.
Repair or replace
Field-repairable faults are the ones outside the housing: wiring, supply, impulse lines, vents, and configuration. Once the diagnosis lands inside the sensor module, replacement is normally faster and cheaper than repair, and always is when the diaphragm has been overpressured or attacked by the process. Confirm on the bench first: apply a known pressure with the transmitter out of the loop and a calibrator or reference gauge attached. If it fails the bench test after trims, the sensor module is beyond repair.
Application example
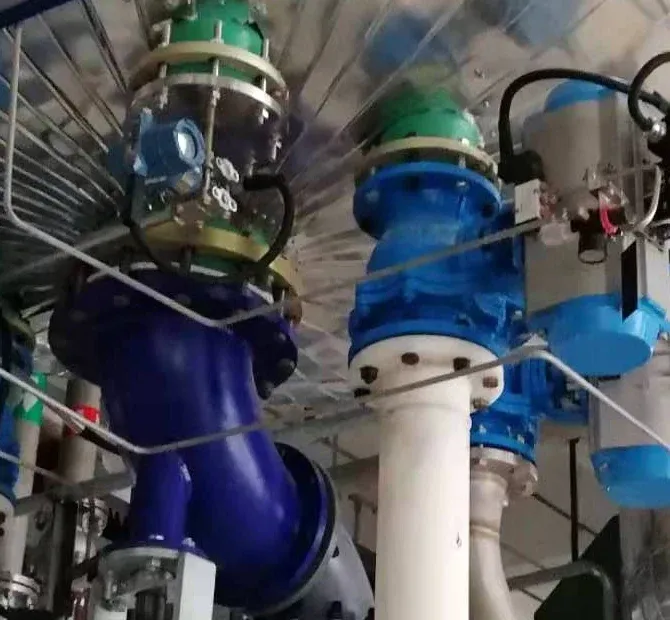
Refrigeration plant, United States. A vacuum transmitter on a refrigeration system failed, and the plant set out to replace it rather than repair it. They shared the details of the original unit, and we proposed a vacuum transmitter matched to the existing range and output signal.
When replacement is the answer, match range, process connection, output, and any approvals before brand. Our pressure transmitters line covers gauge, absolute, and multi-service units, and differential pressure transmitters handle flow and level loops; both can be configured to your range and output before dispatch.
FAQ
How to troubleshoot a faulty pressure transmitter?
Read the loop current first: 0 mA points to wiring or power, below 3.6 mA or above 21 mA is a self-diagnostic alarm, and 3.8 to 4.0 or 20.0 to 20.5 mA is saturation. Then compare the field current with the control room value, check supply voltage at the terminals, and only then open impulse lines or touch calibration.
How do you know if your transmitter is bad?
Bench test it. Take the transmitter out of the loop, power it through a calibrator, and apply known pressures. If the output tracks the reference within its accuracy class at zero, mid, and full scale, the transmitter is good and the fault is in the loop, the process connection, or the control system. If it fails on the bench after trims, replace it.
How to reset a pressure transmitter?
There is no general reset button. Cycling the loop power restarts the electronics, which clears some latched conditions. A zero trim through HART or the local buttons corrects a small verified zero shift with the process vented. Resist trimming a transmitter to force an expected number; if the error is large, find the cause first.
How do you test a pressure transmitter?
Without breaking the loop, measure DC volts across the 250 ohm sense resistor: 1.00 V is 4 mA, 5.00 V is 20 mA. For a direct check, put a multimeter in series on the mA range, or clamp a process current meter around one conductor. For accuracy, apply known pressures at 0, 25, 50, 75, and 100 percent of span and compare each point against the allowed error.
Request a quote
If troubleshooting ends at a transmitter that has to go, tell us the range, process connection, output, and approvals, and we will configure a replacement to your loop sheet. Reach our application engineers or use the form below.
Written and technically reviewed by Wu Peng and the Instranova engineering team.